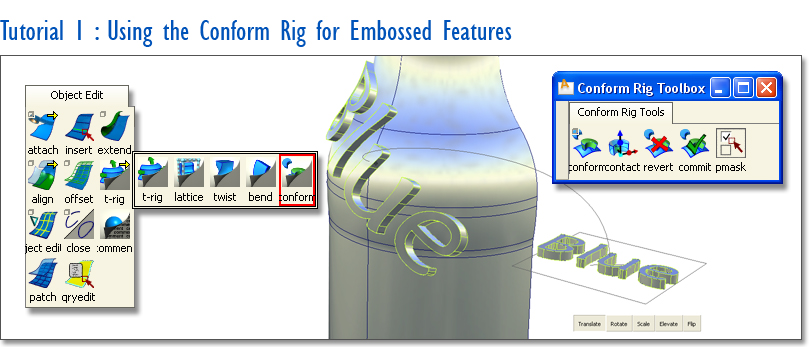
Embossed Features – Lesson 1 : Conform Rig
Beer bottles often have an embossed logo around the shoulder. Electronic gadgets can have their function graphics de-bossed instead of printed. A grip pattern wraps around the surfaces on a steering wheel.
Creating these embossed (or de-bossed) features is straightforward if your surfaces are reasonably flat: simple projecting and trimming will suffice. The problem arises when you want to ‘wrap’ your emboss around a shape with much more curvature. There are three different methods you can use and each will be described in a separate tutorial, starting with the Conform Rig.

In this tutorial, I’ll use the Conform Rig to take a logo which has already been modelled on the XY plane, and wrap it around the curved geometry of a beer bottle. A wire file is provided with the geometry in for you to practice with.
Start by modelling the embossed logo or lettering flat onto the XY plane. The Conform Rig assumes that the geometry is sitting on the XY plane, so you’ll get a more predictable result if you give it what it wants. This can be changed later once the rig has been set up if necessary. And don’t worry too much about getting the right size, as this can be adjusted later using Construction History.
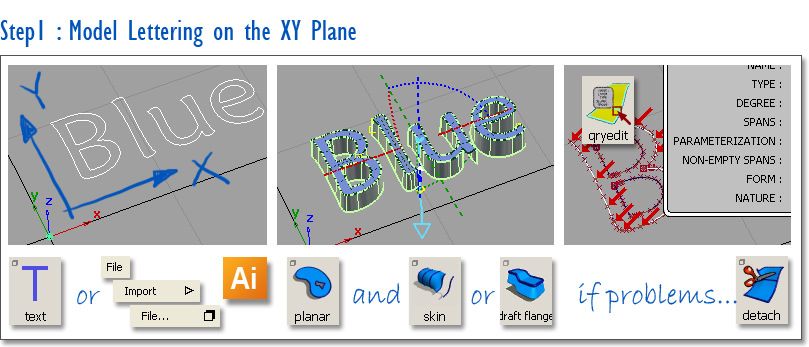
Note : If you create text by importing Illustrator curves you must save in Illustrator Version 8 as Alias cannot import more recent versions. Remember also to expand the text in Illustrator to create separate curves. Use the File - Import - file (or File - Open) to open the illustrator file in AliasStudio.
TIP: A common problem with imported text curves from Illustrator is multi-knots, which can cause the draft tool to give spurious results. Use Object Edit - Query Edit with the right mouse button to show multi-knots. Use Object Edit - Detach to change the multi-knot into two touching curves. (There is an option in the Curve Edit - Curve Rebuild tool to remove multi-knots, but it will often change the curve shape too much.)
Next, click on the Conform Rig Icon to open the toolbox and follow the prompts to set up the rig as shown below. The terminology used can be slightly counter-intuitive. The term ‘target’ is used for the geometry you want to pick up and wrap around the bottle (the lettering). The bottle is the ‘conform destination’.
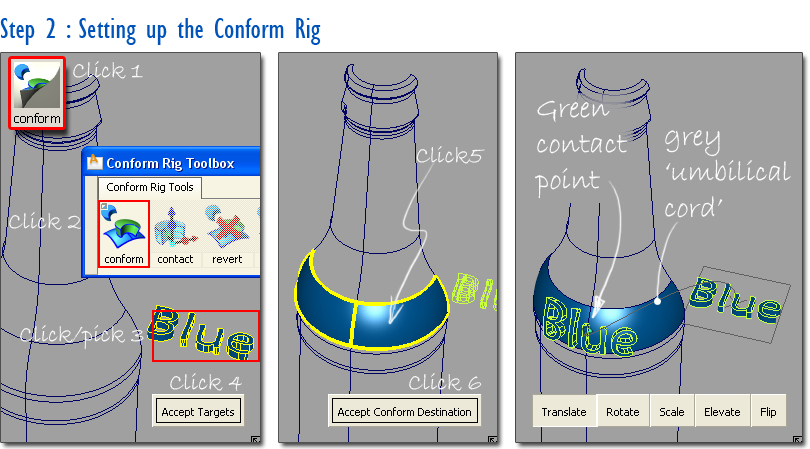
Note : It can be tricky to predict how the Conform Rig will initially place the logo. Usually Conform makes a choice related to the "long" axis of the target (the thing being conformed and changed) and the long axis of the destination. So, if you have a long logo going onto a similarly shaped long surface, it should place correctly. However, if the destination is of an odd shape, there are cases where the math in Conform is known to settle on a rather peculiar orientation. If this happens, use the Transform tools shown below to get the desired orientation.

Use the tool icons at the bottom-right of the screen to adjust the lettering position. Either click and drag on the lettering to adjust the selected value, or type in a value (e.g. a rotation of 180 degrees or an elevation of -1mm). Dropping the lettering below the surface of the bottle will let you intersect and trim the surfaces to create a stitched model.
![]()
Construction History will remain active until you click on the Confirm button in the Conform Rig toolbox. Before then, you can manipulate the lettering in one of four ways:
1. Pick and transform the original geometry. The conformed surfaces will update.
2. Use Object Edit - Query Edit and click on the conformed geometry to make the rig ‘live’ again, then adjust the translate/rotate/scale/elevate/flip settings
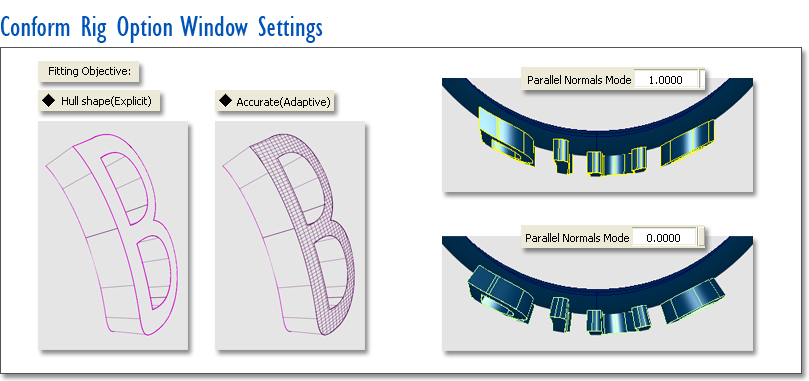
3. In the Conform Rig Toolbox, double-click on the Conform icon. This opens the Conform Rig option box which has extra modifications you can make to the conformed geometry. For example, the ‘Parallel Normals Mode’ (typically 0 or 1) controls the draft on the sides of the lettering. The Hull/Accurate option lets you choose between a light model (which may not stitch), or more complex surfaces that are more accurately shaped, and more likely to stitch.
Note : the option box is only accessible once the conform rig has been set up and is live. Use Query Edit to return the rig to its ‘live’ state.
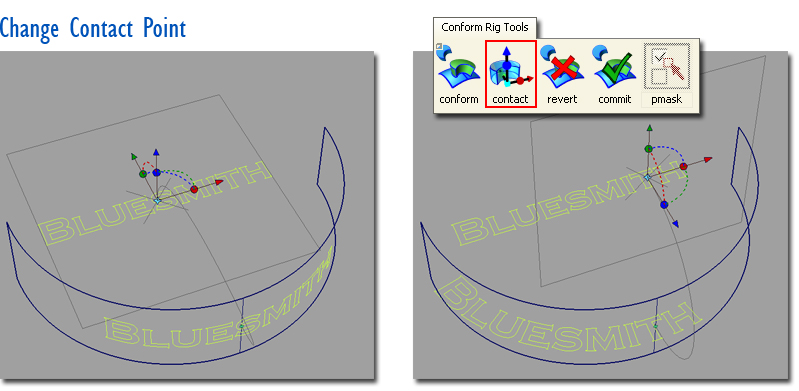
4. Use the Change Contact Point tool to adjust the relationship between the original and applied geometry. The contact point serves as the pivot for the scale and rotate operations. It also defines the placement of the targets after conform. By default the Conform tool puts the contact point at the centre of the bottom of the targets. This can be moved, or the orientation of the placement plane changed using the xyz locator. The illustration below shows an example which creates useful curve distortions.
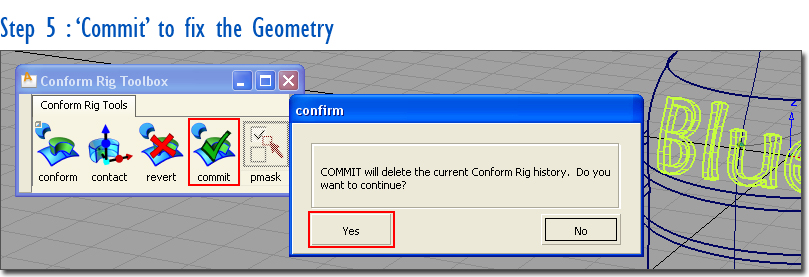
When you are happy with the placement, then choose the Commit icon in the Conform rig toolbox to fix the geometry in place.
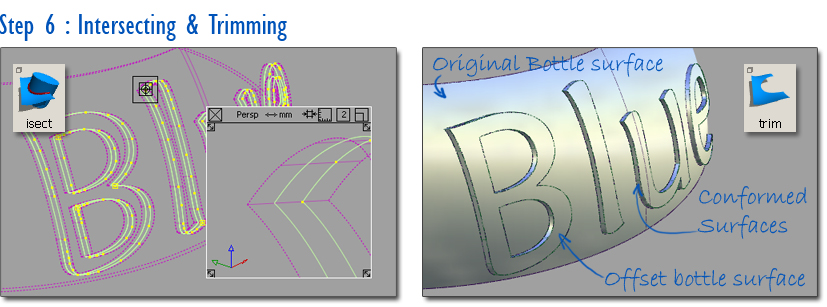
Finally you can finish off the modelling by intersecting and trimming. I’ve chosen here only to create the side surfaces for the letters, and not the faces. Instead I have offset the bottle surface to create the outer face. Use the stitching tools if you need to check your model before data transfer.
Should you try to fillet/round the edges..... ?
Filleting the edges is a horrible job and normally throws up problems. If your modelling is for prototyping, then the cutter radius on the machine tool will normally put on a small fillet, or the model-maker’s rubbing down will knock off the edges. If the model is for rendering, consider using the second technique: displacement mapping which is particularly good for the low definition embossing you typically get on glass bottles.
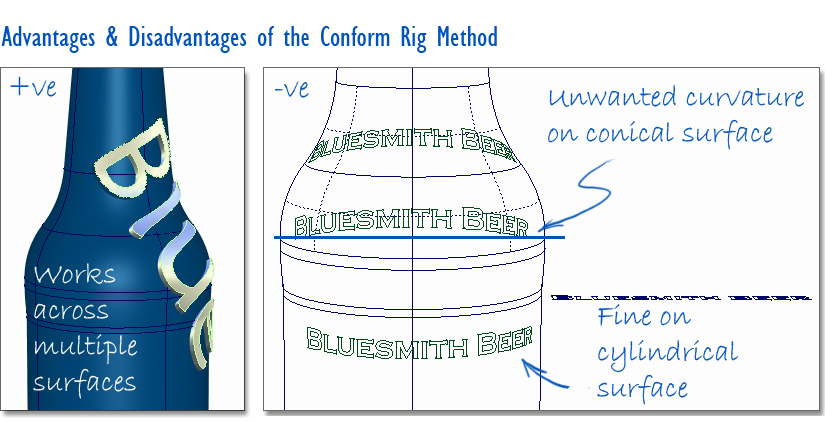
The main advantage of the Conform Rig method is that it will apply the lettering (or any conformed geometry) across multiple surfaces. It is also the quickest of the three methods to set up, and offers the most interactive control.
The main disadvantage is that when you are working on a conical surface, the mapping isn’t perfectly ‘accurate’ in giving you the result that is typically required. To correct this, have a look at the Geometry Mapping explained in the third tutorial.
Experiment with the Conform Rig to see if it will be useful for your design work. It’s not just useful for logos and lettering, but also buttons and other features which need to be applied to complex curved surfaces.
Download Data Files : BeerBottle.wire
Kerry Kingston runs Bluesmith Ltd., an Alias Consultancy and Training company based in the UK.